


Photo by Mariia Shalabaieva on Unsplash
Fundamentals: How to Start Building a ChatGPT Powered Next JS App


A ChatGPT-powered app is all about being able to accomplish the following:
Send prompt to the OpenAI API and then parse the API response; and
Store and/or display the data response to the web app;
The process of accomplishing these tasks in Next.js is surprisingly straightforward. All you need to do is set up your API route handler to send prompts to the OpenAI API using the POST method, await and parse the response, store it (e.g., using useState), and then display or use it within your React component.
A crucial part of building the app involves initializing the API handler in your Next.js project. While many online resources on platforms like YouTube often suggest using TypeScript to create a Next.js app, it's important to note that you can build applications without TypeScript as well. Opting for JavaScript instead simplifies the development process and allows you to quickly prototype apps.
Pre-requisites
OpenAI API Key
An existing Next JS project that does not use TypeScript
Install OpenAI Library
First, install openai library to your project folder.
npm install openai
Create Utility Files for Configuration
Create a utils folder inside the src folder. Then createopenai.js file. Inside it, paste the following code. This is from the openai website, so nothing fancy here.
const { Configuration, OpenAIApi } = require("openai");

const configuration = new Configuration({
  apiKey: process.env.OPENAI_API_KEY,
});
const openai = new OpenAIApi(configuration);

export default openai
As you can see in the apiKey value, the code expects that the OPEN_API_KEY is already defined in an .env file, which should be at the root of your project folder.
Build the API Route Handler Function
Go to the src folder, then pages folder, then api folder. Inside lies the file where we should create our API route handler. For demonstration purposes, let's create a hello.js file inside. We'll be using this code:
import openai from '@/utils/openai.js';

export default async function handler(req, res) {
  const prompt = "Please give a nice meme about Spiderman";

  const aiResult = await openai.createChatCompletion({
    model: 'gpt-3.5-turbo',
    max_tokens: 2048,
    messages: [
      {
        role: 'user',
        content: `${prompt}`,
      },
    ],
  });

  const responseText = aiResult.data.choices[0].message.content;

  res.status(200).json({ responseText });
}
What we've done so far is we've defined an API endpoint in NextJS called api/hello. Here's what happening on the code:
openaimodule is imported from the utility file we created earlier, allowing us to createChatCompletionobjects.The asynchronous
handlerfunction takesreq(request) andres(response) as parameters. TheThe
promptconstant contains our prompt. For now, we're assigning this with a fixed value (i.e. "Please give a nice meme about Spiderman")The
aiResultconstant which calls and awaits theopenai.createChatCompletionfunction to send a request to the OpenAI API to generate ChatGPT's chat response based on the inputted properties, which includes the prompt. To be clear, the inputted properties are what is inside theopenai.createChatCompletion():model: Specifies the version or type of the OpenAI model to use. In this case, we use'gpt-3.5-turbo'.max_tokens: Specifies the maximum number of tokens to generate in the response. Tokens can be roughly thought of as individual words or characters in the model's language.messages: An array containing an object with two properties:roleandcontent. This is our message to ChatGPT which comes from thepromptconstant variable.
Once the response arrives/is completed from the
aiResultAPI call, theresponseTextvariable extracts the content of the generated response from theaiResultobject. It assumes that the response is stored inaiResult.data.choices[0].message.content.Finally, the code sends a JSON response back to the client with a status code of 200 (indicating a successful response). The response includes an object with a
responseTextproperty containing the generated text.
We can now test if the API endpoint route is working. Run the npm run dev to your terminal to start your NextJS app. A URL address should be provided where you can access your app. Since we are testing the API, we're targeting to go at the URL address with /api/hello at the tail. So go ahead and open your browser, and go to the target address (in my case, I went to http://localhost:3000/api/hello).
The page should display the ChatGPT's response to your prompt in JSON format. (Remember that our prompt is Please give a nice meme about Spiderman). I got this response in my page:
{"responseText":"Sorry, as an AI language model, I am not capable of creating visual content like memes or pictures, but I can help you generate memes textually. Here's one:\n\nCaption: When you finally get a date but can't decide which Spidey suit to wear\n\nImage: A split-image of Spiderman looking conflicted with different suits on either side"}
If you got your response as well, your API route handler is working! However, before we proceed, we need to modify the constant prompt (inside the handler function) to facilitate what we will demonstrate in the next sections:
const prompt = req.body.prompt;
This just means that the prompt will now be coming from the req argument that the handler will accept. The rationale behind this comes full circle in the next section.
Send Prompt and Get ChatGPT's Response via API Route Handler
The other half of the work is figuring out how to send a prompt from your web app. What's interesting here is that you can use a user's input to send a dynamic prompt. This is done by using a fetch function to send a POST request to the API endpoint of our app.
At the index.js file of your NextJS (inside the pages folder), let's make a React component to test this:
import { useState } from 'react';

function TestPage() {
  const [aiReply, setAIReply] = useState('');

  const fetchChatGPTResponse = async (prompt) => {
    try {
      const response = await fetch('/api/hello', {
        method: 'POST',
        body: JSON.stringify({ prompt }),
        headers: { 'Content-Type': 'application/json' },
      });

      const data = await response.json();
      const responseText = data.responseText;
      setAIReply(responseText);
    } catch (error) {
      console.error('Error:', error);
    }
  };

  return (
    <div>
      <button
        className="block"
        onClick={() => fetchChatGPTResponse('Give nice meme about Deadpool')}
      >
        Deadpool
      </button>
      <button
        className="block"
        onClick={() => fetchChatGPTResponse('Give nice meme about Wolverine')}
      >
        Wolverine
      </button>
      <div>{aiReply}</div>
    </div>
  );
}

export default TestPage;
What essentially happens here is that:
We use
useStatehook to store the ChatGPT's response, which our state variable is namedaiReply.An async function named
fetchChatGPTResponseis our main tool to accomplish the following:Fetch data to our API endpoint
api/helloviaPOSTmethod, where the body of our request is thepromptargument. Focus on this part of the syntax:.... <button className="block" onClick={() => fetchChatGPTResponse('Give nice meme about Deadpool')}> Deadpool </button> <button className="block" onClick={() => fetchChatGPTResponse('Give nice meme about Wolverine')}> Wolverine </button> ....The
promptargument is taken from the button (click event). This is to simplify user's input to determine the prompt. You can change this into an input textbox or any mechanism to get user's input to manipulate theprompt.Also, remember our API route handler? Since we modified the
promptvariable to get the data from thereqargument viaconst prompt = req.body.prompt, the message that will be sent to OpenAI is thepromptargument that is passed to thefetchChatGPTResponse.Await API endpoint's response, and then parse the response to string.
Store the parsed data to our
aiReplyhook variable (usingsetAIReply)
Once the
fetchChatGPTResponseis successfully called, meaning the ChatGPT's response is stored toaiReplyhook, our page will automatically display the response in the designated div element..... <div>{aiReply}</div> ....
To test, click either Deadpool or Wolverine. Here's what I got as response:
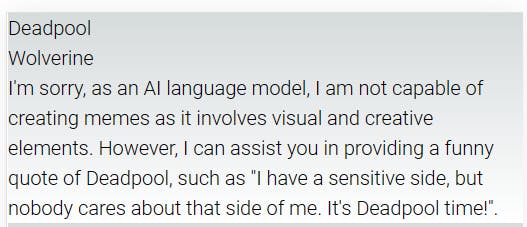
And this is what I got for Wolverine. Yeah, ChatGPT's data on memes sucks:

Overall, what we have done so far is send prompts to ChatGPT based on inputs from the web app and display the responses. Understanding this concept has become a necessary requirement for every developer, similar to knowing how to create a simple CRUD app. However, one area that still requires refinement is the art of engineering prompts to get useful responses from ChatGPT. By mastering this skill, we can leverage the full potential of ChatGPT and enhance our applications with additional functionalities